by Ron Lancour
Vice President, British Columbia Trapper's Assoc.
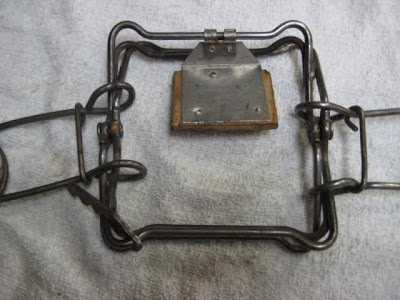
Here are 5 different methods of making pans on your conibear traps. Pans in my opinion are the only way to go for Mink. I like them at my Marten sets as well as they catch any Ermine that comes along. You can make these on any size conibear trap you are going to use in a cubby or in a box.
First off, all triggers are bent at a right angle about 1/2 or 5/8 inch up on the prongs.
The first and very easy method is with the corrugated sign material. Just cut it to size, poke the trigger wires through the corrugation and bend the tips of the triggers to hold it in place. Spray paint and your ready to go.
(Click to enlarge any pic.)
Number two method is with a piece of tin. Drill 4 holes and weave the trigger prongs in. Bend under the tips of the wire trigger to hold the tin fast. Paint.
Number three method is with wire screen. Cut to size, weave trigger wires in and out of the screen and bend tips to hold fast. Spray paint.
Now my favorites are the wooden pans. Number 4 method is with a thin piece of plywood stapled onto the trigger wires and and then the ends bent to hold it in place.
Number five is the most complicated to do but my favorite wood pan. First drill out the pins in the trigger clips. Cut a piece of tin like shown in the picture and pop rivet it on the clips. Now I take a piece of thinned plywood and pop rivet that on to the tin.
Trapping Articles and Reviews of Trapping Supplies by Trappers for Trappers
Welcome!
Thanks for visiting Trapping Supplies Review. This is a place for trappers to share their insights on all things related to trapping. If you would like to contribute a trapping article, equipment review or stories and pictures from your trapline, please click "contact me" in the sidebar and I'll be happy to include your post. Meantime, please feel free to post comments on any topic if you have additional insights. Together we can make this website a valuable resource for trappers.


No comments:
Post a Comment